If your roof is suddenly leaking after a Birmingham thunderstorm, the fastest way to stop water damage is with a proper temporary roof tarp installation. At Reliable Service Roofing, we’ve handled hundreds of emergency roof tarping calls across Birmingham, AL, and we know exactly how to tarp a leaking roof safely and effectively until permanent repairs can be made. This step-by-step emergency guide walks you through the best way to tarp a roof as a DIY temporary roof cover, while highlighting when to call professionals like us for expert emergency roof tarping.
Tarping isn’t a permanent fix — it’s an emergency temporary roof repair tarp that buys you time. In Birmingham’s humid, storm-prone climate, acting fast can save your ceilings, insulation, and even your home’s structure from costly water intrusion. Whether you need a DIY roof tarp or professional help, this guide covers everything from tools to safety.
Why Emergency Roof Tarping Matters in Birmingham, AL
Birmingham experiences frequent heavy rains, high winds, thunderstorms, and occasional hail — all of which can rip off shingles, crack flashing, or create holes that lead to immediate leaks. Homeowners in neighborhoods like Hoover, Vestavia Hills, Homewood, and Mountain Brook often call us after a single storm because water can pour in within hours.
A well-installed temporary roof tarp prevents interior damage, protects your insurance claim, and gives you breathing room until full roof repair in Birmingham can be scheduled. We’ve seen tarps save families thousands in mold remediation and structural repairs right here in the 35242 area and beyond.
Safety First: How to Safely Install a Roof Tarp
How to safely install a roof tarp starts with one rule: never risk your life for a temporary fix. Wet or damaged roofs in Birmingham are slippery, especially after rain. Always:
- Work with a spotter holding the ladder.
- Wear non-slip shoes, gloves, safety glasses, and a harness if possible.
- Never tarp during active rain, high winds, or lightning.
- Avoid steep pitches or unstable sections.
If the roof feels soft or you’re uncomfortable at heights, stop immediately. That’s when you call Reliable Service Roofing for 24/7 emergency roof tarping at (205) 370-3160.
Tools and Materials Needed for Temporary Roof Tarp Installation
For a successful DIY roof tarp or professional job, gather:
- Heavy-duty 8–10 mil reinforced polyethylene tarp (blue tarps show up best for insurance photos).
- 1×2 or 2×4 furring strips/boards to sandwich edges.
- Plastic cap nails or 1.5–2″ roofing screws.
- Trowel or putty knife for lifting shingles.
- Broom, shovel, measuring tape.
- Optional: plywood for large holes, sandbags, waterproof tape, safety harness.
Buy a tarp that extends at least 4–6 feet beyond the damage on every side.

Step-by-Step: How to Tarp a Roof (Roof Leak Tarp Step by Step)
Here’s the exact how to tarp a roof step by step process we teach our clients and use ourselves for temporary roof cover DIY guide success.
Step 1: Assess and Protect the Interior
From the ground, locate the leak and measure the damaged area. Take photos for insurance. Inside, move valuables, place buckets, and cover floors. In Birmingham homes, a single leak can ruin drywall fast.
Step 2: Clear Debris
Climb safely and remove loose shingles, nails, branches, and leaves. Clean several feet around the damage so the tarp lies flat and won’t puncture.
Step 3: Position the Tarp Correctly
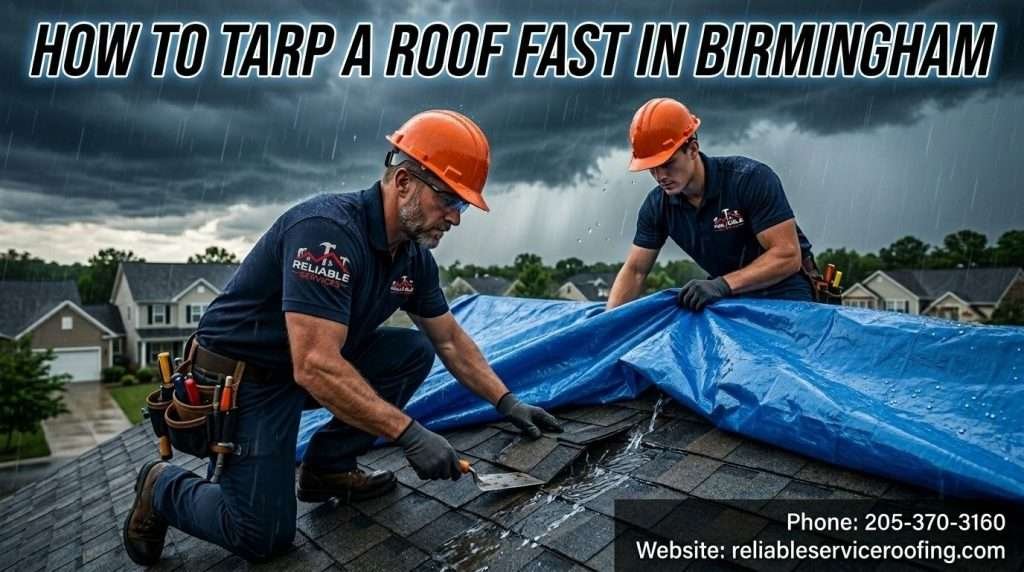
Center the tarp over the damage. Lift shingles 1–2 rows above the leak with your trowel and tuck the top edge underneath — this is the #1 secret to how to tarp a leaking roof successfully. Extend over the ridge if needed so water sheds off both sides.
Step 4: Secure with Boards (Best Professional Method)
Roll bottom and side edges around 1×2 or 2×4 boards. Screw through board + tarp + shingles into the deck every 12–16 inches. Angle the bottom board downward so water runs off. This “sandwich” technique is the best way to tarp a roof because it prevents tearing and wind lift.
Step 5: Final Checks and Sealing
Pull the tarp taut (no wrinkles or pools). Seal vents and edges with waterproof tape but never block plumbing vents. Add sandbags for extra wind protection common in Alabama storms.
Step 6: Monitor and Maintain
Check after every wind or rain event. Remove within days or weeks — never leave a temporary roof tarp up long-term.
This roof leak tarp step by step method works for most shingle roofs in Birmingham and surrounding areas.
How to Cover a Roof with a Tarp: DIY vs. Professional Comparison
A DIY roof tarp works for small, accessible damage if you’re experienced. For larger holes, steep roofs, or multiple leaks, professional temporary roof tarp installation is safer and more effective. We arrive with proper equipment and can often tarp the same day.
Cost of Emergency Roof Tarping in Birmingham, AL
Professional emergency roof tarping in Birmingham typically costs $600–$1,500 depending on roof size, access, and urgency. Smaller jobs start around $300–$700 while larger or after-hours calls can reach $2,000. Factors include:
- Tarp size and thickness
- Labor for board installation
- Emergency dispatch fees (common after Birmingham storms)
- Roof pitch and height
Many insurance policies cover emergency temporary roof repair tarp costs — we help file claims daily. DIY materials alone run $50–$250, but the risk of improper installation often leads to bigger repairs later.
Common Mistakes to Avoid When Tarping a Roof
- Nailing directly through the tarp without boards (it tears in wind).
- Skipping the tuck-under-shingles step.
- Creating low spots that trap water.
- Leaving the tarp for months (UV damage and more leaks follow).
We’ve fixed these exact mistakes for homeowners in Trussville and Pelham.
Prevention Tips and Roof Maintenance in Birmingham
To avoid needing how to tarp a roof again:
- Schedule annual inspections (twice yearly in our humid climate).
- Clean gutters before storm season.
- Trim overhanging trees.
- Replace missing shingles immediately.
- Consider impact-resistant shingles for hail-prone areas.
Regular maintenance from Reliable Service Roofing keeps roofs storm-ready across the Birmingham metro.
Emergency Roof Tarping in Birmingham and Nearby Areas
We proudly serve the entire Birmingham area from our office at 2700 Corporate Drive Suite 200, Birmingham, AL 35242. Whether you’re in Hoover, Vestavia Hills, Homewood, Mountain Brook, Trussville, Pelham, Alabaster, Chelsea, Irondale, or Fultondale, our team provides fast emergency roof tarping and full roof repair in Birmingham.
Local conditions vary slightly — steeper hills in Vestavia mean extra safety precautions, while larger homes in Hoover often need bigger tarps. No matter your neighborhood, we’re just minutes away.
When to Call a Professional in Birmingham
Call Reliable Service Roofing immediately if:
- The damage covers more than 10×10 feet.
- You see sagging or soft spots in the roof.
- Water is already entering your home.
- You’re unsure about ladder safety or roof stability.
- It’s after hours or during a storm.
Don’t wait — one night of rain can turn a small leak into major damage.

Why Choose Reliable Service Roofing for Emergency Roof Tarping in Birmingham
With over 15 years serving Birmingham families, Reliable Service Roofing is the local expert for how to tarp a roof and permanent fixes. We offer:
- 24/7 emergency response
- Insurance claim assistance
- High-quality materials that last until full repair
- Licensed, insured, and locally trusted crews
- Same-day service for most tarping calls
Homeowners in 35242 and surrounding zip codes choose us because we treat every home like our own. From initial temporary roof tarp installation to complete roof replacement, we deliver reliable results every time.
Ready for fast, professional help? Visit our roof repair in Birmingham service page here: Roof Repair in Birmingham, AL or call (205) 370-3160 for a free estimate today.
FAQs
Professional emergency roof tarping in Birmingham usually costs between $600 and $1,500 depending on the size of the damage and urgency.
Yes, a DIY roof tarp is possible for small damage if you follow safety steps and the tuck-under-shingle method, but professionals are safer for larger leaks.
A properly installed temporary roof tarp should be removed within 7–30 days maximum to avoid further damage.
Most homeowner policies cover emergency tarping after storm damage — we help document and file claims daily.
The best way uses the board-sandwich method with the top edge tucked under shingles and generous overhang for proper water shedding.
Call immediately if the roof feels unstable, damage is widespread, or you’re uncomfortable working at heights.
We’re at 2700 Corporate Drive Suite 200, Birmingham, AL 35242, and proudly serve the entire metro area including Homewood, Mountain Brook, and beyond.