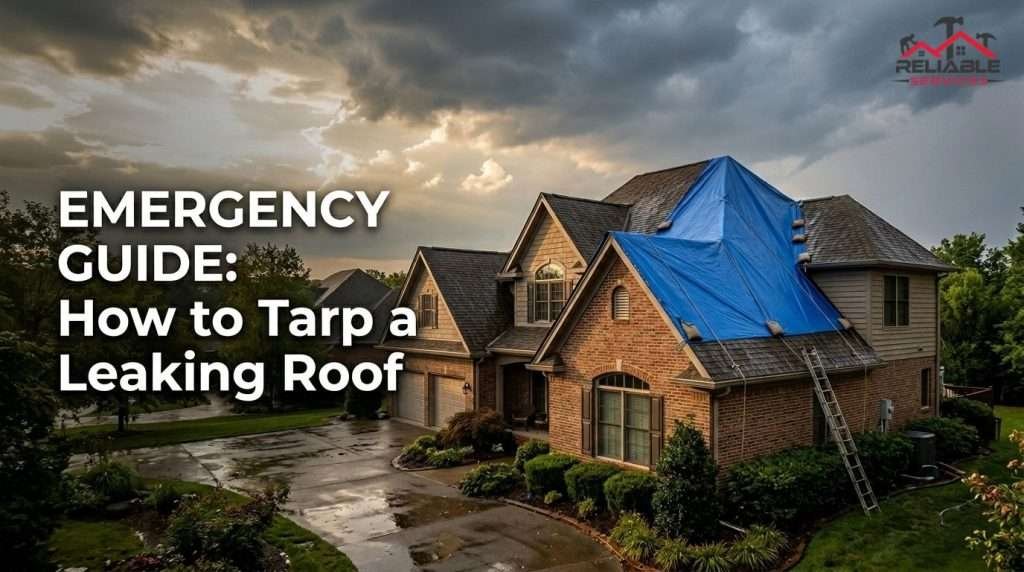
To tarp a leaking roof effectively, you must clear away structural debris, measure the damaged section, and secure a heavy-duty, water-resistant tarp using wooden 2×4 anchor boards screwed directly over the peak of the roof. Never rely on bricks, sandbags, or bungee cords, which blow away during high winds. Securing the tarp correctly creates a critical temporary barrier that stops water from infiltrating your ceiling while you arrange for permanent repairs.
When severe Alabama storms drop heavy rain or knock trees onto your property, an exposed roof can destroy your home’s interior within hours. Taking immediate action to mitigate structural water intrusion is essential. However, working on a high, wet roof slope presents severe physical hazards. Knowing how to tarp a roof safely, what materials work best, and when to call a professional contractor will protect both your home and your physical safety.
Safety Warnings and Immediate Inspection Priorities
Before attempting any DIY roof tarping, safety must be your absolute priority. Roof surfaces are incredibly slick when wet, and structural damage from storms can make the decking unstable.
- Never Work During an Active Storm: Do not climb onto a roof while it is actively raining, lightning, or when high winds are blowing. Wait until the storm has completely passed and the roof surface has dried.
- Inspect for Structural Failure from the Ground: If a heavy tree branch or tree trunk has impacted your home, do not step onto the roof decking. The rafters underneath may be cracked or completely broken, putting you at extreme risk of falling through.
- Watch for Downed Power Lines: Ensure there are no low-hanging or broken utility lines touching your roof, gutters, or nearby trees. Wet roofs conduct electricity instantly.
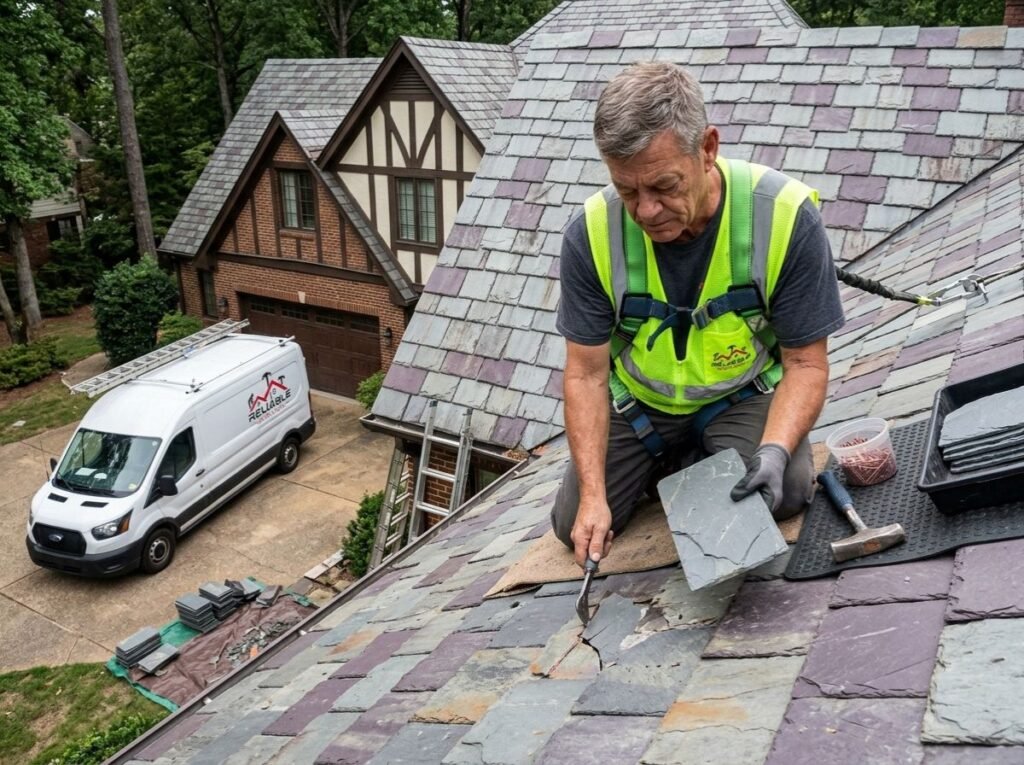
- Utilize Proper Safety Equipment: Always wear slip-resistant boots, heavy-duty work gloves, safety goggles, and an approved fall-protection safety harness tied securely to a stable structural anchor point.
Choosing the Right Materials: Tarp Thickness & Tools
Using a cheap, thin tarp will result in the material shredding during the next heavy wind or downpour. To ensure your temporary patch holds up until permanent structural fixes can be scheduled, you must select the correct commercial-grade materials.
What is the Best Type and Thickness (Mil) of Tarp for Roofing?
The best type of tarp for temporary roof protection is a heavy-duty, UV-resistant woven polyethylene or vinyl-coated tarp. For maximum protection against wind and debris, select a tarp with a thickness of at least 10 mil to 12 mil (mil represents one-thousandth of an inch). Avoid lightweight blue utility tarps (typically 3 mil to 5 mil), as they break down rapidly under direct sunlight and tear easily.
Essential Tools and Materials Checklist
Gather all necessary supplies before ascending the ladder to minimize trips up and down:
- A 10-to-12 mil heavy-duty poly tarp (sized appropriately for the damage).
- Four to six straight wooden 2×4 boards (or 1×4 wood battens) to create anchor strips.
- 3-inch exterior-grade wood screws (designed to resist rusting).
- A cordless drill with extra battery packs.
- A heavy-duty extension ladder with proper stabilizer extensions.
- A utility knife or heavy shears to trim excess material.
- A measuring tape to calculate dimensions accurately.
How to Measure How Much Tarp You Need
A common mistake is buying a tarp that matches the exact size of the hole or damaged area. This will fail immediately, as rain will simply run underneath the edges.
To measure how much tarp you need for your roof size, first determine the square footage of the visible damage from a ladder or safety viewpoint. Add at least 3 to 4 feet of overhang on all sides of the damaged area. Crucially, the top edge of the tarp must be long enough to extend completely over the peak (ridge) of the roof and hang down at least 2 feet on the opposite side.
Overlapping the ridge prevents rushing rainwater from running down the slope and flowing straight under your patch. If your damaged area is 10×10 feet, you will need at least a 20×20 foot tarp to properly overlap the peak and sides.

How to Tarp a Leaking Roof: Step-by-Step Instructions
Once conditions are dry and safe, follow this precise method to securely install your emergency protection.
1.Remove Debris and Identify the Leak:Clear the Target Zone.
Use a broom or gloved hands to clear broken tree branches, loose pine needles, and shattered shingles away from the damaged area. Locate the exact source of water penetration.
2.Position the Tarp Over the Ridge:Unroll and Align the Material.
Unroll your heavy-duty tarp over the damaged area. Pull the top edge completely over the peak of the roof so water naturally flows over the tarp rather than trapping underneath it.
3.Wrap the Tarp Around Wooden 2×4 Boards:Create Strong Anchors.
Lay a wooden 2×4 board along the top edge of the tarp. Roll the board inward two or three times so the tarp wraps tightly around the wood. This distribution prevents the screws from ripping through the fabric.
4.Screw the Anchor Boards Down Securely:Fasten into the Roof Structure.
Drive 3-inch exterior screws through the wrapped 2×4 board directly into the roof structure. Space screws roughly 10 to 12 inches apart. Repeat this wrapping and screwing process along the bottom and side edges.
5.Tighten the Sides and Inspect the Perimeter:Verify Uniform Tension.
Pull the side panels completely taut to eliminate wrinkles or pockets. Secure the remaining sides with additional wood battens to prevent heavy winds from lifting the material.
How to Secure a Tarp on a Roof Without Damaging Shingles or Gutters
While you must fasten the tarp securely to survive Alabama storms, you want to avoid causing unnecessary extra damage that complicates your eventual permanent repair.
Never Use Roofing Nails or Staples
Do not use roofing nails, staple guns, or adhesive glues directly onto exposed shingle faces. Staples and nails rip out easily under heavy wind loads, creating hundreds of tiny, fresh puncture holes that will leak once the tarp is removed.
Best Practices for Fastening
Always drive your screws through the thick wooden 2×4 anchor blocks rather than directly through bare tarp grommets. The wood spreads out the clamping pressure evenly across the shingles.
When securing the lower edge near your eaves, never screw directly into aluminum gutters or vinyl fascia boards. This can bend, crack, or destroy your drainage system. Instead, terminate your lower anchor board on the roof decking just above the gutter line, or wrap the tarp around the eave and secure it to the structural rafter tails or exterior wall underneath the gutter assembly.
Common Mistakes to Avoid When Tarping a Roof
Avoiding these critical procedural errors will keep your home dry and protect your long-term insurance standing:
- Tarping Horizontally Across a Slope: If you place a tarp entirely on one side of a slope without running it over the peak, water flowing from higher up the roof will seep directly under the top edge.
- Using Sandbags or Bricks for Weight: Placing heavy objects on top of a loose tarp is incredibly dangerous. High wind gusts will easily catch the fabric, turning bricks or sandbags into flying hazards that can smash your windows or injure neighbors.
- Leaving Sagging Pockets: If the tarp is installed loosely, it will collect pooling rain water. The weight of stagnant water will eventually bow your roof decking, causing a catastrophic structural cave-in.
- Covering Active Vents Incorrectly: Avoid blocking functional furnace flues or gas water heater exhaust vents, which can trap carbon monoxide inside your living spaces.
Lifespan Realities: How Long Can a Tarp Stay on a Roof?
A roof tarp is strictly a temporary emergency mitigation step—it is not a permanent fix.
Leaving a tarp on your home for more than 60 to 90 days can cause secondary damage. Because tarps do not breathe, they trap rising interior moisture and heat directly beneath the plastic sheet. This creates a hot, humid greenhouse effect that accelerates the growth of black mold and wood rot across your plywood decking.
Additionally, long-term exposure to Alabama’s intense UV rays will eventually degrade the plastic polymers, causing the tarp to crack, flake, and leak.
Insurance and Cost Breakdowns in Birmingham, AL
Understanding the financial and legal components of emergency property mitigation can save you thousands of dollars out of pocket.
Does Homeowner’s Insurance Cover Emergency Roof Tarping Costs?
Yes, standard homeowner’s insurance policies almost always cover the cost of emergency professional roof tarping. In fact, most policies contain a “Duties After Loss” clause. This clause legally obligates the homeowner to take immediate, reasonable action to mitigate ongoing damage after a storm.
Failing to tarp an open roof leak allows rainwater to destroy drywall, flooring, and personal electronics. If the insurance adjuster determines you allowed avoidable interior damage to occur by not installing temporary protection, your insurance carrier may deny your secondary interior water damage claims.
How Much Does Professional Roof Tarping Cost in Alabama?
If you choose to bypass the physical risks of climbing a ladder, hiring an expert crew is highly cost-effective, especially since it is typically reimbursed by your insurance carrier.
| Area / Project Scope | Average Local Price Range | What is Included? |
| Small Isolated Leak (<500 sq. ft.) | $300 – $600 | Inspection, debris removal, standard poly tarp, wood battens |
| Medium Storm Damage (500-1,000 sq. ft.) | $600 – $1,100 | Multi-story safety gear, heavy-duty 10-mil tarping |
| Severe/Emergency After-Hours Work | $1,200 – $1,800+ | Same-day dispatch, complex framing integration, tree limb handling |
Neighborhood Spotlight: Our Birmingham Metro Service Area
We provide rapid, emergency response tarping and structural repairs throughout the entire Birmingham metropolitan region. When storm systems sweep through Jefferson and Shelby Counties, our localized crews deploy rapidly to protect residential and commercial properties.
- Birmingham Central (35203, 35223, 35242): Serving downtown commercial spaces, historical residential properties in Avondale, and homes near our local office base at 2700 Corporate Drive Suite 200, Birmingham, Alabama 35242.
- Hoover & Riverchase: Providing immediate emergency mitigation for residential properties experiencing roof hail impacts and structural limb damage.
- Vestavia Hills & Mountain Brook: Specializing in precision temporary tarping designed to shield valuable custom interiors without damaging high-end architectural roof designs.
- Trussville, Clay, & Gardendale: Offering rapid-response storm dispatch to the northern and eastern suburban residential corridors.
- Pelham & Alabaster: Delivering commercial and residential emergency support along the heavy structural growth pathways of Shelby County.

When to Call a Professional in Birmingham, AL
While small, low-slope DIY fixes are possible, you should immediately step aside and call a licensed professional contractor if any of the following factors are present:
- Steep Roof Slopes (High Pitch): If your roof has a dramatic slope where walking normally is impossible without specialized high-grip traction gear and harness lines.
- Multi-Story Properties: Any home or commercial space requiring complex scaffolding or 30-foot extension ladders introduces significant fall hazards.
- Active Structural Damage: If a fallen tree has cracked your home’s ridge beam or rafter configuration, making the framing unstable to walk on.
- Widespread Storm Disasters: When major tornadoes or severe hail events impact large portions of your roof system, requiring industrial-scale vinyl membranes and structural tie-downs.
Why Choose Reliable Service Roofing for Your Emergency Needs?
At Reliable Service Roofing, we treat your emergency with the absolute highest level of urgency. We understand that a leaking roof isn’t just an inconvenience—it is an immediate threat to your family’s safety and property investments.
- Rapid Local Response: Operating straight out of the Birmingham metro area, we deploy crews quickly to seal your home before secondary water damage takes hold.
- Comprehensive Insurance Documentation: We don’t just throw up a plastic sheet. We take detailed, timestamped high-resolution photos of the structural damage before installation to ensure your insurance adjuster has everything required for a smooth claim approval.
- Seamless Transition to Permanent Repairs: We are a full-service professional contracting company. Once your property is secure, we provide comprehensive permanent repair and replacement solutions.
- OSHA-Compliant Safety Standards: Our teams are fully licensed, highly insured, and rigorously trained in high-altitude structural safety protocols.
Secure Your Property Before the Next Storm Hits
An emergency roof leak requires an immediate, reliable shield. If your home has been hit by recent severe weather, don’t risk your physical safety on a steep, slick roof ladder. Let our professional team handle the dangerous work safely and efficiently.
Contact us today to arrange your emergency professional service. To ensure your structural asset remains fully protected from the elements over the long haul, explore our comprehensive Birmingham Roof Repair Services to schedule an advanced structural assessment and permanent damage restoration today.
FAQ
You need a heavy-duty 10-mil tarp, wooden 2×4 anchor boards, 3-inch exterior wood screws, a cordless drill, safety goggles, heavy work gloves, and an approved fall-protection safety harness.
Measure the damaged zone and add at least three to four feet of perimeter overhang on all sides, ensuring the top edge is long enough to pull over the roof ridge line completely.
Clear the roof surface of debris, position the tarp over the peak of the slope, roll the edges tightly around wooden 2×4 boards, and screw those boards directly into your roof decking.
Fasten the tarp by driving exterior screws through protective wooden anchor boards rather than bare metal grommets, and never drive screws directly into your gutter tracks or vinyl fascia boards.
A high-quality emergency tarp should remain on your roof for no more than 60 to 90 days before trapped moisture and direct heat begin causing structural wood rot or mold growth.
Yes, standard homeowner’s insurance policies cover professional emergency tarping costs under your policy’s mandatory damage mitigation requirements.
Professional emergency roof tarping costs across Alabama typically range from $300 to $1,500, depending primarily on the total square footage of the damage and your roof’s pitch complexity.